
Third in the series of pictures taken during the finishing of my RV-6A.
Click on the thumbnails for a larger image.
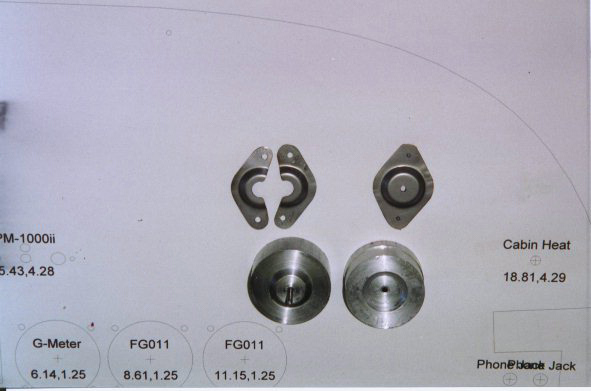 I am so cheap. I could not bring myself to spend 6 bucks apiece for firewall shields so I made a set of dies using my trusty metal lathe. Stainless steel from the firewall cut out was used to make the neat little firewall shields you see here.
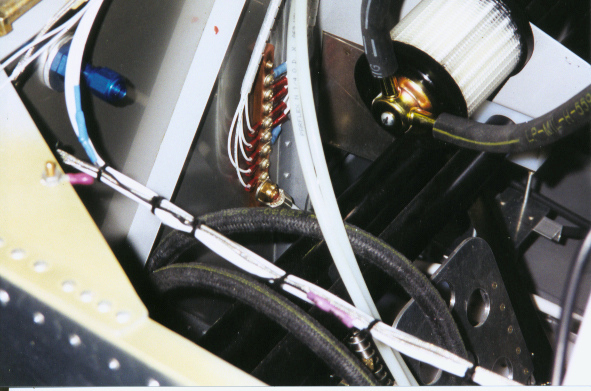 I was done with my electrical system when the local "Rocket Scientist" showed up. He looked things over and said I needed a single point ground for all my electrical goodies. I fabricated one from a copper bar and number 8 screws. The battery ground attaches to the bottom via a brass stud which then passes through the firewall connecting to another #2 cable and finally to the engine crankcase.
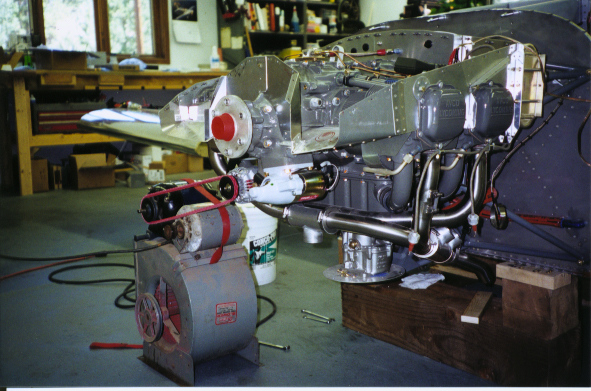 After testing all of the electrical circuits there was one left to test. Since the battery was at about 75% I chose to test the alternator to see if it would charge the battery. The first motor with the smaller pulley would not spin the alternator fast enough so I mounted my lathe's motor which had a larger pulley and worked great.
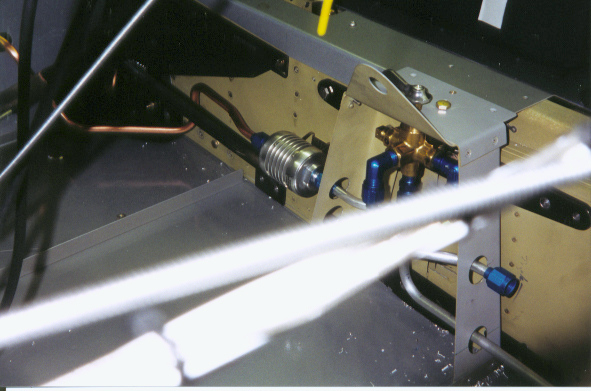 No gascolators in this airplane. My 1941 ford 9N has one and it always freezes in winter. Here is how I plumed my K&N filters. Pilots side is not attached in this picture. The filter mounts to a plate that is attached to the airframe via 4 of the wing bolts. The copper line is not final and is used only for fitting purposes.
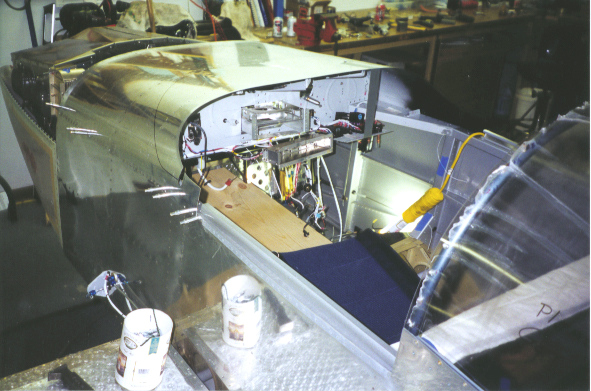
 Believe it or not the electrical system is finished in this photo. this is just before installation of the fwd top skin on my sliding canopy 6A. The panel can be seen in the background.
 I know it is out of sequence but I was waiting for my wife to rivet the fwd skin on. This is the fitting of the prop spinner on my Sensenich 72FM metal propeller.
 My wife finally showed up and we riveted the fwd top skin on. I cut a board to fit between the rudder pedals and on top of the battery box so it would span between the wing spar and battery box. The wife cringed when I took her newly made seat cushions to pad my back.
 I know I'm jumping around a lot, but hey, that's how you build one of these things. Here my wife is inspecting the fit of the wingtip. The strap was taped to the wing leading edge with the other end hooked over the trailing edge tip. This along with foam inserts inside allowed us to pull the wingtip up snug with the leading edge radius. I used #6 screws to attach the tips.
 I purchased the nav light extensions from Van's and this is the hole that is cut in the wingtip for there attachment.
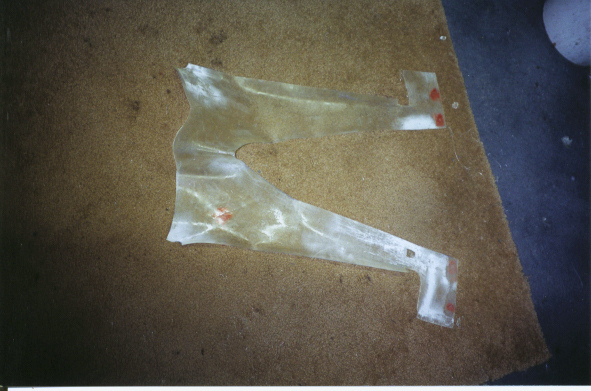 Van's empenage faring fit so poorly I used a tip from the RV-list and used the original as a mold to make this single layer lay-up. I only had 2oz cloth and should have used 2 layers as the lay up was a little flimsy.
 Here is the single layer lay-up taped and fitted to my empenage. Clear shelf plastic (it use to be paper) is protecting the aluminum from the fiberglass. I waxed the plastic so the cured faring would come off easy.
 Here I have laid the first of 3 layers of 9oz cloth.
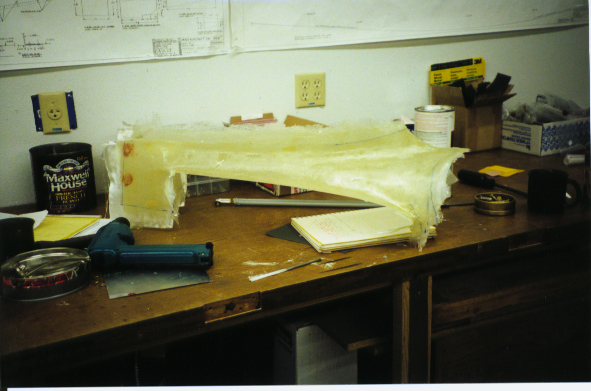 Here is the faring removed from the plane and before trimming.
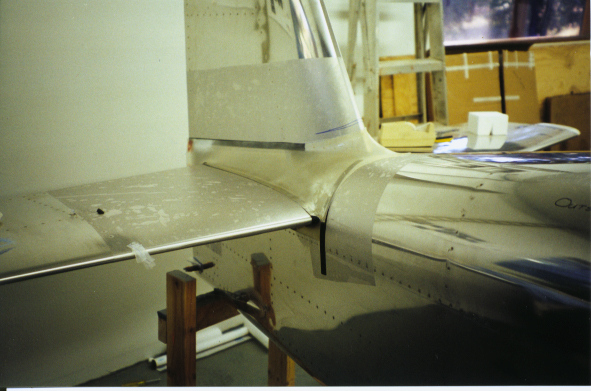
 I did not use peel-ply and had to fill the weave of the glass with micro balloons and ended up with a few pinholes. I primed and block sanded the faring and then attached with 4 screws per side, 3 in the back and the one shown here up front.
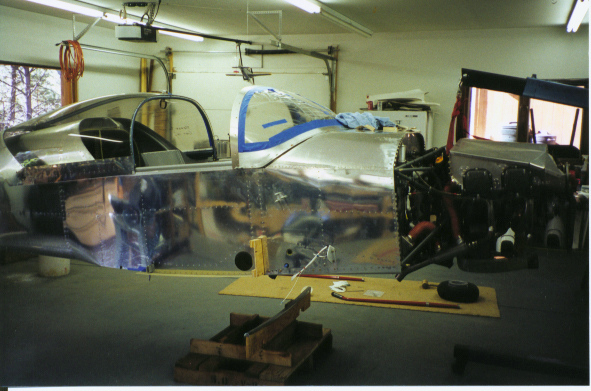 After removing the wings and receiving my new nose gear here we are hoisting the fuselage up to install the landing gear.
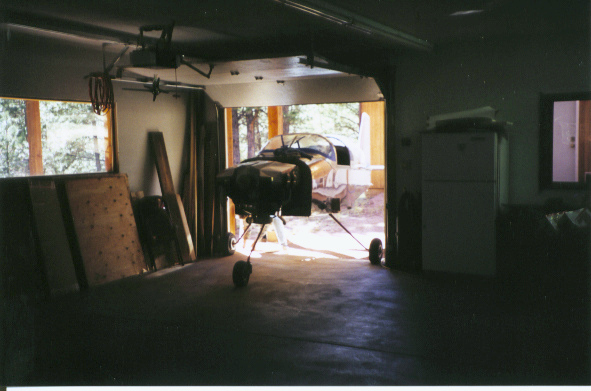 Venturing outside for the first time. An 8' door and 9' horizontal stab took some creative jockeying to get through the door.
 An outside shot of the first trek outside.
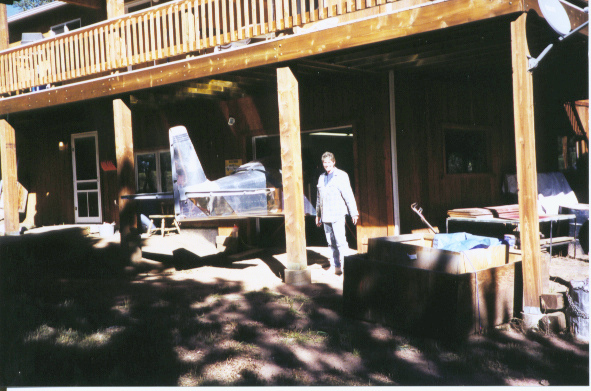
 Sitting proudly in my driveway just before getting a good bath in preparation for painting.