
THE EMPENAGE
Here are a few pictures taken during construction of the empenage of my RV-6A.
Click on the thumbnails for larger pictures.
THE EMPENAGE
Here are a few pictures taken during construction of the empenage of my RV-6A.
Click on the thumbnails for larger pictures.
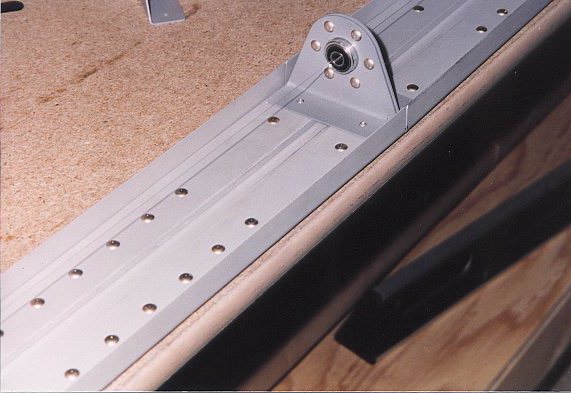 After many hours of nerve wracking frustration laying out, drilling and riveting the HS rear spar, it was time to locate the hinges. This photo shows how I used fishing line (as the manual recommends) to locate the center line of the hinge.
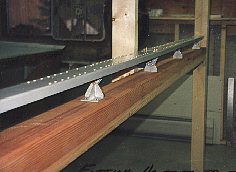 After all the hinges were carefully riveted on, the HS rear spar is mounted on the simple home made jig. The 4x4 that was used as the cross piece of the jig was not perfectly straight and shims had to be placed under the mounting brackets to assure perfect alignment of the rear spar. I used the fishing line approach to check alignment of the brackets.
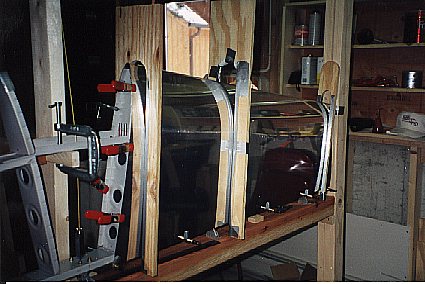 Once the skeleton is riveted together the skins are fitted . This photo shows some simple clamping blocks made from 1/2" plywood and padded with duct tape. Before fitting the skin, careful measurements were made of the internal structure and then transferred to the skin for drilling. Laying out the rivet lines and patterns is no longer necessary with the new Pre Punched skins.
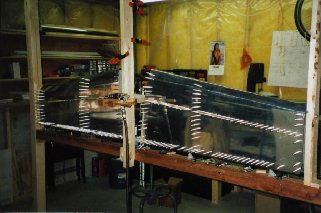 After drilling and dimpling the skins they are once again installed on the skeleton and are ready to rivet in place. My wife and I started riveting on the top side as the riveting is easier with the easy access from the bottom. The bottom side of the skins is more of a challenge since the skins have to peeled back to allow bucking.
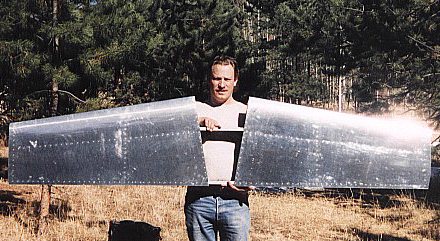 The first major piece of My RV-6A is complete.